

Solving Update Error 0x800f0988 in Windows 11 and 10: 4 Easy Methods
Occasionally, when attempting to download and install new cumulative updates, users may encounter an error message stating: Update failed. There were difficulties installing certain updates, but we will retry the installation at a later time.
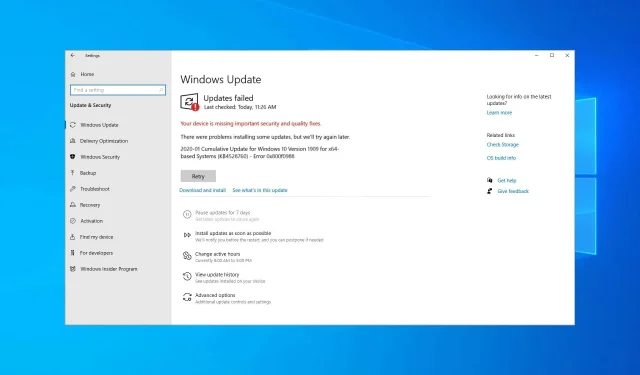
The presence of error code 0x800f0988 is preventing the installation of the latest patch updates on Windows 10.
Despite the frustration it may cause, there are various methods that can assist in resolving the issue.
This guide will demonstrate dependable methods for resolving update error 0x800f0988, similar to how we addressed Windows 10 error 0x800f0900.
Why does update error 0x800f0988 appear in Windows 11?
While installing updates, various issues may arise, and a number of users have reported encountering update errors 0x800f0831 on Windows 11.
In the event that your update files are corrupted, it is likely that this will occur; therefore, removing and recreating them could potentially resolve the issue. If you encounter update error 0x800f0986, you can address it by utilizing the built-in troubleshooter.
Several users have encountered problems while attempting to install update messages on their computer. However, these issues can easily be resolved by following the steps outlined in this guide.
How to fix Microsoft Update error?
If your PC is experiencing issues with Microsoft Windows Update, it is likely that you will frequently miss out on important updates. Common causes for update failure include network connectivity problems, hardware malfunctions, and insufficient disk space.
To address the issue, simply run the Windows Troubleshooter, which will identify and resolve any potential causes. For more extensive methods to resolve this problem, refer to our guide on resolving Windows Update errors in Windows 11.
What to do if update error 0x800f0988 occurs?
1. Empty the WinSxS folder.
- To open the command prompt, press the Windows key and type “cmd” in the search bar using the S key.
- Right-click Command Prompt to select Run as administrator.
- Now enter the command below and press Enter :
dism /online /cleanup-image /startcomponentcleanup
- After the command clears the WinSxS folder, restart your computer.
Regardless of the method chosen, you can use the steps described above to clean out the WinSxS folder in Windows 10.
2. Run the Windows Update troubleshooter.
- Enter “troubleshooting” in the Windows search box.
- To access the Windows Troubleshooter, simply click on Troubleshooting Options.
- Choose the option for “Advanced troubleshooters” and utilize the additional troubleshooting tool provided.
- Click Windows Update.

- Finally, click the Run the troubleshooter button.

If error 0x800f0988 persists, utilizing the Windows Update troubleshooter may prove beneficial in resolving the issue. This tool, provided by Microsoft, is designed to assist users with any update-related problems and may be of assistance in your situation as well.
If the troubleshooter abruptly halts before the process is finished, utilize this comprehensive guide to resolve the issue.
3. Reset Windows Update components.
- To open Command Prompt as an Administrator, follow these steps.
- Enter the commands below and click Enter after each:
net stop wuauservnet stop cryptSvcnet stop bitsnet stop msiserver - Now enter the commands below and click Enter after each:
ren C:WindowsSoftwareDistribution SoftwareDistribution.oldren C:WindowsSystem32catroot2 Catroot2.old - Finally, run the commands below to restart the services:
net start wuauservnet start cryptSvcnet start bitsnet start msiserver
Applying these steps promptly may also resolve cumulative update errors, as resetting update components is known to be effective in resolving them.
4. Reset Windows 10
- Enter reset this PC into the Windows 10 search tool.
- Press the “Get Started” button located in the “Reset this PC” section.
- Choose the option to “Save my files“.
- Click on the “Next” and “Reset” buttons.
According to users, error 0x800f0988 can be resolved by restarting their computer. This option will restore your computer to its original state, either preserving or deleting programs and personal files based on the chosen option.
As Windows will handle everything automatically, minimal effort is required. Therefore, it is worthwhile to try this procedure.
How to fix Windows 11 update error 0x800f0988?
The error 0x800f0988 during a Windows 11 update may be a result of damaged or absent system files. In such a scenario, simply run a DISM scan as an administrator in the Windows terminal.
One of the identified reasons for the issue is corrupt update data. This can be resolved by performing a cleaning of the Windows Update component. The steps for implementing these solutions are outlined in this guide.
Lastly, you can also attempt the remaining solutions as they are all effective for both Windows 10 and 11.
How to force Windows to update?
To ensure that Windows searches for and installs updates, there are multiple methods available. These include the Settings app, PowerShell, and various built-in tools.
The simplest method is to execute the command control update in the command line.
This instruction initiates the Windows Update function and looks for available updates to be installed.
These are a few solutions that can resolve error 0x800f0988. If none of them are successful, you can manually install cumulative updates by downloading them from the Microsoft Update Catalog.
Is there improvement now? We welcome you to share your experience with us in the comments section below.
Leave a Reply